Homemade coconut ice-cream affogato

Homemade coconut ice-cream affogato

Dairy based ice-creams are great but in an effort to reduce my dairy intake in order to improve PCOS symptoms I needed an alternative. Store bought non-dairy ice-creams have so many artificial ingredients and never taste as good as the real deal.

This led me to trying to make my own, so I came up with this coconut based version and it is super creamy, not too coconut-y and absolutely delicious!

Let’s get mixing…

Whisk the coconut milk, sugar and vanilla extract together until the sugar melts. Pour into silicone muffin molds and freeze for 3 hours.

Remove from molds into a blender, add in the plant based milk and blend until smooth. Scoop into a freezer friendly container and freeze until you’re ready to use.

Affogato

Start by brewing your coffee, I use a French press but you can make it the way you prefer.

Scoop 2 spoons of ice-cream into a heat proof glass. Gently pour the coffee over the ice-cream and enjoy!

Coconut ice-cream affogato

Servings

2

servings
Prep time

10

minutes
Cooking time

4

hours 

Ingredients

  • Ice-cream
  • 1 can full fat coconut milk

  • ½ cup sugar, less if you do not want it too sweet

  • ½ tsp vanilla extract

  • ½ cup plant based milk

  • Affogato
  • 4 scoops of ice-cream

  • 500 ml of good quality coffee

Directions

  • Ice-cream
  • Whisk the coconut milk, sugar and vanilla extract together until the sugar melts. Pour into silicone muffin molds and freeze for 3 hours
  • Remove from molds into a blender, add in the plant based milk and blend until smooth
  • Scoop into a freezer friendly container and freeze until you’re ready to use.
  • Affogato
  • Start by brewing your coffee, I use a French press but you can make it the way you prefer.
  • Scoop 2 spoons of ice-cream into a heat proof glass
  • Gently pour the coffee over the ice-cream and enjoy!
Gluten free chocolate mug cake

Gluten free Chocolate mug cake

Sometimes you have a late night craving for cake and nothing else will do. In that instance I have the perfect little gluten free chocolate mug cake that will satisfy that craving in under 5 minutes! It doesn’t get better than that.

Let’s get cooking…

Start by mixing together the dry ingredients. Then make a well in the center and add in the wet ingredients.

Stir to combine, divide into 2 mugs and microwave for 60-90 seconds depending on your power, I did so for 70 seconds with a 900W microwave.

Dust with icing sugar and enjoy! This is also really great with a little dollop of ice-cream on top.

Swaps…

By using dairy free milk and dark chocolate this is easily made dairy free too!

Chocolate mug cake

Servings

2

servings
Prep time

5

minutes
Cooking time

3

minutes

Ingredients

  • 1/2 cup gluten free flour

  • 4 tblsp cocoa

  • 4 tblsp castor sugar

  • 1/2 tsp baking powder

  • 4 tblsp oil

  • 1/2 cup milk

  • 1/2 tsp vanilla

  • 2 tblsp chocolate chunks

Directions

  • Mix together the dry ingredients
  • Then make a well in the center and add in the wet ingredients
  • Stir to combine, divide into 2 mugs and microwave for 60-90 seconds depending on your power
  • did so for 70 seconds with a 900W microwave
  • Dust with icing sugar and enjoy!
Rhubarb compote chia parfaits

Rhubarb compote and chia parfaits

Rhubarb has always fascinated me, the first time I heard about was in a rhubarb and strawberry pie and it always confused me to know that a stem of a plant could add so much flavor and be used in sweet dishes. I had seen on TV in cooking shows often, however, It would be many years before I would actually be able to taste it and be able to cook with it. But boy, once I tried I knew the reason for all of the hype!

My favorite way to use this plant is to turn it into a compote. Very quick and easy to make and lasts for weeks when refrigerated and most of all it is vegan. An easy way to incorporate it into your routine is in a breakfast parfait.

Let’s get cooking…

Chop up the rhubarb into 2 cm chunks, add to a saucepan along with the water, vanilla, sugar and lemon rind. Simmer on a low heat for 20 minutes, stirring occasionally.

Once cooked, allow to cool completely before decanting into a glass jar and refrigerate for up to 2 weeks.

To make the parfaits, mix the milk and chia seeds and allow to thicken either overnight or for 30 minutes before serving.

Layer 1 tblsp of compote in the bottom of a glass. then add a layer of 1/4 of the chia pudding and 2 tablespoons of yoghurt over that. repeat once more. Serve and enjoy.

Swaps…

If you don’t love chia pudding you can always swap out the chia for some healthy homemade granola.

Rhubarb compote and chia parfaits

Servings

10

servings
Prep time

5

minutes
Cooking time

20

minutes

Ingredients

  • Rhubarb compote
  • 500g rhubarb

  • 6 tblsp sugar

  • 1/4 cup water

  • rind of 1 lemon

  • 1/2 tsp vanilla extract/paste

  • Parfait
  • 4 tblsp chia seeds

  • 1 cup milk of choice

  • 250g plain Greek yoghurt

Directions

  • Chop up the rhubarb, add to a saucepan along with the water, vanilla, sugar and lemon rind. Simmer on a low heat for 20 minutes, stirring occasionally.
  • Once cooked, allow to cool completely before decanting into a glass jar and refrigerate for up to 2 weeks.
  • Parfaits
  • Mix the milk and chia seeds and allow to thicken either overnight or for 30 minutes before serving.
  • Layer 1 tblsp of compote in the bottom of a glass. then add a layer of 1/4 of the chia pudding and 2 tablespoons of yoghurt over that. repeat once more.
  • Serve and enjoy.
south african melktert

South African melktert

One of the most famous desserts to come out of South Africa is the milktart or more commonly known as melktert. This simple dessert is made with common store cupboard ingredients and is utterly delicious.

Let’s get cooking…

Blitz the biscuits in a food processor until fine crumbs then add butter. Place into a tart pan and press in to line the pan. Allow to set in the freezer while making the filling.

Heat milk, vanilla and condensed milk stirring constantly until the condensed milk dissolves. Whisk egg whites to a soft peak and set aside. Whisk egg yolks with corn starch, water and salt. When the milk boils remove from the heat and slowly add the egg yolk mixture stirring vigorously.

Return the pot to the heat and whisk until the mixture thickens, about 10-15 minutes. Add egg whites and whisk until combined. Pour the filling into the pie shell, sprinkle with cinnamon and refrigerate until set, about 2 hours.

Swaps…

Can be made completely dairy free by using plant based milk, I find oat milk works well and dairy free condensed milk.

South African melktert

Servings

8-12

servings
Prep time

20

minutes
Cooking time

20

minutes

Ingredients

  • 200g rich tea biscuits

  • 150g melted butter

  • 700ml full cream milk

  • 1 tin condensed milk

  • 2 tsp vanilla extract

  • 2 eggs, separated

  • 50gm corn starch

  • 50 ml water

  • Cinnamon to decorate

Directions

  • Blitz the biscuits in a food processor until fine crumbs then add butter
  • Place into a tart pan and press in to line the pan
  • Set in the freezer while making the filling
  • Heat milk, vanilla and condensed milk stirring constantly until the condensed milk dissolves
  • Whisk egg whites to a soft peak and set aside
  • Whisk egg yolks with corn starch, water and salt
  • When the milk boils remove from the heat and slowly add the egg yolk mixture stirring vigorously
  • Return the pot to the heat and whisk until the mixture thickens, about 10-15 minutes
  • Add egg whites and whisk until combined
  • Pour the filling into the pie shell, sprinkle with cinnamon and refrigerate until set.
Vermicelli

Milky vermicelli (Kheer/Payasam)

Diwali morning is finally here and it is a cause for celebration. There is generally so much excitement in the air in anticipation of all the fun, good food and happy times that the day has in store for us. While we normally spend it with family, this year will be slightly different due to the exceptional circumstances and current lockdown (can 2020 be over already??).

In order to drag out the celebration and make every part of the day extra special I decided to cook a decadent breakfast… traditionally called payasam or kheer, this is a sweet, milky dessert made with vermicelli noodles, condensed milk and milk. It is undeniably one of the most delicious Indian sweets you will ever taste!

Let’s get cooking…

Start by breaking the vermicelli noodles into 2 cm sized pieces. Toast the vermicelli and sago in a dry pan then when it begins to colour a little add the butter and cinnamon and fry for 5-10 minutes. Then add in boiling water to just cover the vermicelli and cook on low heat for 15 minutes, stirring regularly.

Once the sago starts to become clear add in the milk and the condensed milk, about 10 minutes. Continue to cook until the sago is almost cooked, a further 5 minutes. Taste and add sugar accordingly, I used the full tablespoon but you could use less. Mix in cardamom powder and enjoy

Milky vermicelli (Kheer/Payasam)

Servings

4

servings
Prep time

10

minutes
Cooking time

30

minutes

Ingredients

  • 100g vermicelli

  • 2 cups of milk

  • Boiling water

  • 50g Butter

  • 2 Cinnamon sticks

  • 1 tsp Cardamom powder

  • 2 tblsp Sago

  • 4 tblsp Condensed milk

  • 1 tblsp white sugar

Directions

  • Toast the vermicelli and sago in a dry pan then when it begins to colour a little add the butter and cinnamon and fry for 5-10 minutes
  • Then add in boiling water to just cover the vermicelli and cook on low heat for 15 minutes, stirring regularly
  • Once the sago starts to become clear add in the milk and the condensed milk
  • Continue to cook until the sago is almost cooked
  • Taste and add sugar accordingly
  • Mix in cardamom powder and enjoy

Dry, sweet vermicelli

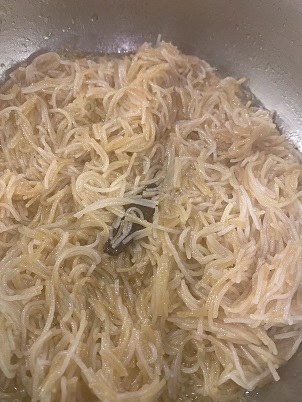
Dry vermicelli
Dry vermicelli

Vermicelli is a very popular Indian dessert and it often cooked in a rich, milky base that is flavoured with cardamom and cinnamon and sweetened with condensed milk. As delicious as this is, I often get a hankering for this dessert but do not want to open up an entire can of condensed milk for just a small portion.

On days like this I lean towards my mom’s dry fried vermicelli. The flavour is very similar as both cinnamon and cardamom are both used but there is no liquid, milky base. It still hits home like the creamy dessert would but is much more diet friendly.

Let’s get cooking…

Break up the long vermicelli noodles into small pieces, about 2cm long. Melt butter in a pan and add in the broken vermicelli and cinnamon sticks. Fry until lightly golden.

When the vermicelli is lightly browned, remove the pot from the heat and begin adding the boiling water a little at a time stirring constantly. Put the pot back on the heat and cook for 10 minutes stirring frequently. Add sugar and cardamom powder and cook for a further 5-10 minutes.

Once the noodles are soft and all of the water has been absorbed, the dessert is cooked. Best served hot with a good cup of tea.

Dry, sweet vermicelli

Servings

2

servings
Prep time

5

minutes
Cooking time

30

minutes

Ingredients

  • 50 g butter

  • 2 cinnamon sticks

  • ½ – 1 cup of Boiling water

  • Sugar

  • ½ tsp cardamom powder

  • 250g Vermicelli noodles

Directions

  • Melt butter in a pot and fry vermicelli with the cinnamon on a low heat.
  • When the vermicelli is lightly browned, remove the pot from the heat and begin adding the boiling water a little at a time stirring constantly.
  • Put the pot back on the heat and cook for 10 minutes stirring frequently. Add sugar and cardamom powder and cook for a further 5-10 minutes.
  • Once the noodles are soft and all of the water has been absorbed, the dessert is cooked.
  • Best served hot