Turkish inspired doner kebab

Turkish doner kebab
Turkish doner kebab

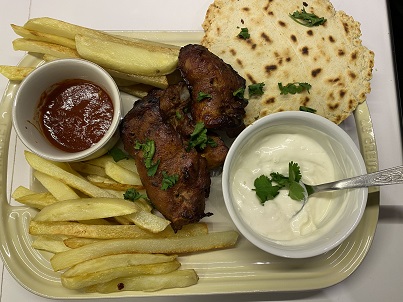
Another truly unforgettable meal/dish from my trip to Istanbul was the doner kebab. This is basically made form lamb or chicken that has been generously seasoned, skewered together and slow roasted on a rotisserie to provide gorgeously tender shavings of meat to be layered into soft warm pita or fluffy flat breads topped with zingy salads and a refreshing drizzle of tzatziki.

I’m making a chicken version that has been marinated over night in a marinade taken from the wonderful Meliz cooks, I’ve tweaked the method a little to adjust for my oven and achieve the best results possible.

Let’s get cooking…

Mix all of the ingredients together and marinade overnight or for a minimum of 2 hours

About 30 minutes before cooking, remove the marinated chicken from the fridge and soak the wooden skewers in water to prevent it from burning.

Using 3 skewers, thread each fillet horizontally onto the 3 skewers, pushing each fillet closely together but leaving a little room for it to cook

Place over an oven dish so that the skewers are resting on the dish and the chicken is not touching the bottom of the dish

Roast for 20 minutes at 180, remove from the oven, baste and turn over, roast for a further 20 minutes and repeat once more for a total cooking time of 60 minutes.

Remove from the oven and allow to rest

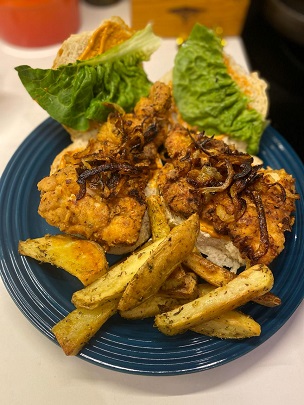
I served mine with oven fried potato chips, flat breads and tzatziki.

Turkish inspired doner kebab

Servings

4

servings
Prep time

10

minutes
Cooking time

1

hour 

Ingredients

  • 1kg chicken thigh fillets, about 6 thighs

  • 3 tbsp natural yoghurt

  • 2 tbsp pomegranate molasses

  • 2 tbsp red pepper paste OR tbsp tomato puree

  • 2 tbsp olive oil

  • 1 tbsp honey

  • 1 tbsp fresh lemon juice

  • 1 tsp dried oregano

  • ½ tsp ground cumin

  • ¼ tsp ground cinnamon

  • ½ tsp crushed chillies

  • ½ tsp paprika

  • ½ tsp onion granules

  • ½ tsp garlic granules

  • Salt and pepper to taste

Directions

  • Mix all of the ingredients together and marinade overnight or for a minimum of 2 hours
  • About 30 minutes before cooking, remove the marinated chicken from the fridge and soak the wooden skewers in water to prevent it from burning.
  • Using 3 skewers, thread each fillet horizontally onto the 3 skewers, pushing each fillet closely together but leaving a little room for it to cook
  • Place over an oven dish so that the skewers are resting on the dish and the chicken is not touching the bottom of the dish
  • Roast for 20 minutes at 180, remove from the oven, baste and turn over, roast for a further 20 minutes and repeat once more for a total cooking time of 60 minutes.
  • Remove from the oven and allow to rest
  • served mine with oven fried potato chips, flat breads and tzatziki.
Cauliflower and pea curry

Cauliflower and peas

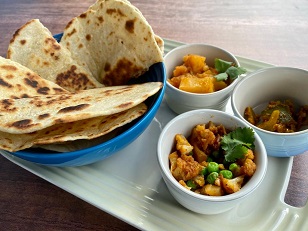
It’s meat free Monday again and this is another favourite in our house. A braised cauliflower and pea curry, also known as Gobi Matar by some, this uses just a handful of ingredients and comes together in a snap when you’re short on time.

it can be made with either fresh or frozen cauliflower which means it’s a great pantry meal for when you haven’t had a chance to grocery shop. The sweet pops of the peas works really well with the savoury notes from the cauliflower.

Let’s get cooking…

Start by braising the onion in 2 tablespoons of oil until translucent, then add in the turmeric, chilli powder and curry powder and cook out for a few seconds.

Once fragrant add in the tomatoes and cook until tomatoes disintegrate and a thick curry paste forms.

Add in the cauliflower and salt to taste, stir well to combine, add in ½ cup of water to allow the cauliflower to cook on medium heat.

Check regularly and top up water if the cauliflower is still too firm. Once cauliflower is soft, most of the water should have dried out by now, add in the peas and turn off the heat. Allow to rest for 10 minutes.

Serve with rice or roti

Cauliflower and pea curry

Servings

4

servings
Prep time

10

minutes
Cooking time

20

minutes

Ingredients

  • 1 head of cauliflower, cut into small florets

  • ½ cup frozen peas

  • ½ onion, thinly sliced

  • ½ tomato, finely diced

  • ¼ tsp turmeric

  • ½ tsp Kashmiri chilli powder

  • 1 tsp curry powder

  • Oil

  • Salt

Directions

  • Braise onion in 2 tablespoons of oil until translucent, then add in the turmeric, chilli powder and curry powder and cook out for a few seconds.
  • Once fragrant add in the tomatoes and cook until tomatoes disintegrate and a thick curry paste forms.
  • Add in the cauliflower and salt to taste, stir well to combine, add in ½ cup of water to allow the cauliflower to cook on medium heat.
  • Check regularly and top up water if the cauliflower is still too firm. Once cauliflower is soft, most f the water should have dried out by now, add in the peas and turn off the heat. Allow to rest for 10 minutes.
  • Serve with rice or roti

Southern fried chicken burger

Southern fried chicken burger

One of my husband’s absolute favourite meals is a good chicken burger. Since moving to London, one of the best burgers he has had is a southern fried style chicken burger from Borough market. However, the enforement of stay at home orders due to the Coronavirus has meant that we have not been able to eat out for a long time.

So I set about creating my own version of this burger. After a few tries I have finally created something that comes very close to the original burger.

Let’s get cooking…

Combine the ingredients for the yoghurt marinade and allow the chicken to marinade overnight for best results or minimum 1 hour. When you are ready to start cooking, mix together all of the ingredients for the flour dredge and toss each chicken fillets into the flour mixture. Ensure that flour coats the chicken thoroughly. Shallow fry until golden, 5-6 minutes per side.

This is best served with a chipotle mayo, lettuce, crisp onions on a toasted brioche roll.

Southern fried chicken burger

Servings

4

servings
Prep time

10

minutes
Cooking time

20

minutes

Ingredients

  • Yoghurt marinade
  • 4 chicken thigh fillets, flattened

  • 2 tblsp yoghurt and a splash of milk

  • 1 tsp Salt

  • ½ tsp Pepper

  • ½ tsp cumin

  • 1 tsp ginger and garlic paste

  • 1 tsp harissa

  • 1 tsp peri peri spice

  • Flour seasoning
  • ½ cup flour

  • 1 tsp garlic powder

  • 1 tsp salt

  • ½ tsp pepper

  • 1 tsp peri-peri spice

  • 1 tsp cumin

  • 1 tsp thyme

Directions

  • Combine the above ingredients and allow to rest overnight in the fridge.
  • Combine seasonings with the flour
  • Once you’re ready to cook, dredge the chicken into the flour mixture
  • Shallow fry for 5-6 minutes per side until golden
  • Serve with chipotle mayo, lettuce and crisp onions on brioche buns

Dry, sweet vermicelli

Dry vermicelli
Dry vermicelli

Vermicelli is a very popular Indian dessert and it often cooked in a rich, milky base that is flavoured with cardamom and cinnamon and sweetened with condensed milk. As delicious as this is, I often get a hankering for this dessert but do not want to open up an entire can of condensed milk for just a small portion.

On days like this I lean towards my mom’s dry fried vermicelli. The flavour is very similar as both cinnamon and cardamom are both used but there is no liquid, milky base. It still hits home like the creamy dessert would but is much more diet friendly.

Let’s get cooking…

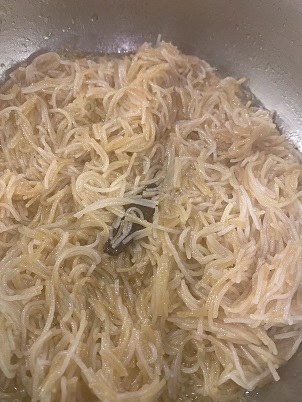
Break up the long vermicelli noodles into small pieces, about 2cm long. Melt butter in a pan and add in the broken vermicelli and cinnamon sticks. Fry until lightly golden.

When the vermicelli is lightly browned, remove the pot from the heat and begin adding the boiling water a little at a time stirring constantly. Put the pot back on the heat and cook for 10 minutes stirring frequently. Add sugar and cardamom powder and cook for a further 5-10 minutes.

Once the noodles are soft and all of the water has been absorbed, the dessert is cooked. Best served hot with a good cup of tea.

Dry, sweet vermicelli

Servings

2

servings
Prep time

5

minutes
Cooking time

30

minutes

Ingredients

  • 50 g butter

  • 2 cinnamon sticks

  • ½ – 1 cup of Boiling water

  • Sugar

  • ½ tsp cardamom powder

  • 250g Vermicelli noodles

Directions

  • Melt butter in a pot and fry vermicelli with the cinnamon on a low heat.
  • When the vermicelli is lightly browned, remove the pot from the heat and begin adding the boiling water a little at a time stirring constantly.
  • Put the pot back on the heat and cook for 10 minutes stirring frequently. Add sugar and cardamom powder and cook for a further 5-10 minutes.
  • Once the noodles are soft and all of the water has been absorbed, the dessert is cooked.
  • Best served hot

Baba ghanoush

Baba ghanoush
Baba ghanoush

Inspired by my trip to Turkey, I decided to create some of my favourite dishes from my time travelling around the beautiful city of Istanbul.

Turkish food for me in synonymous with vegetable based dips, my favourite being baba ghanoush. A rich and deeply flavoured roasted aubergine dip that is so moreish and versatile. I personally love it for mid afternoon snacking, it’s so delicious that it’s easy to forget that this dip is also very healthy.

Let’s get cooking…

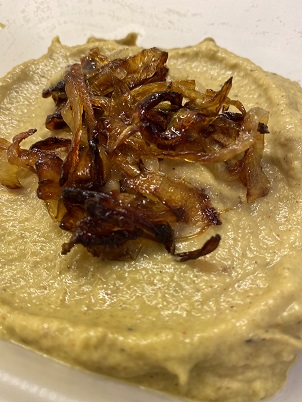
Slice an aubergine in half, lengthwise and score the flesh in a diamond pattern. Brush with olive oil and season. Bake at 180 for 45 minutes until the aubergine is very tender. You can also throw 3 garlic cloves into the roasting dish. Allow it to cool just enough so that you can handle it. scoop out the flesh and pop into a blender with tahini, lemon juice, salt, roasted garlic, salt and pepper. Blend it all together until smooth and creamy.

Serve with crackers or crudites and enjoy.

Baba ghanoush

Servings

6

servings
Prep time

5

minutes
Cooking time

45

minutes

Ingredients

  • 1 large aubergine

  • 2 cloves garlic

  • 1 tsp tahini

  • ½ tsp cumin powder

  • 1 tblsp lemon juice

  • Olive oil to thin

Directions

  • Cut aubergine in half and score in a diamond pattern, season
  • Roast at 180 for 40-45 minutes
  • Scoop out flesh, blend with the remaining ingredients
  • Add caramelized onions, optional

Potato chutney

Potato chutney
Potato chutney

There’s nothing quite like spending only 10 minutes in the kitchen after a long Monday and ending up with a delicious, satisfying and super easy meal. Potato chutney is a riff on a potato curry very similar ingredients but completely different flavour profiles.

It is very satisfying when served alongside kitchiri because the tomato chutney cuts through the richness of the rice and the potato makes it a heartier meal.

Let’s get cooking…

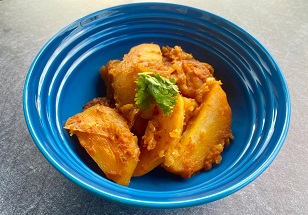
The base of this dish is made from a simple tomato chutney, thinly slice an onion and saute in oil until translucent. Spice with a little chilli and curry powder to your preferred heat tolerance and add pureed tomatoes and salt. Bring tomatoes to a boil and then at this point add in the potato slices. The flavour of the chutney will be absorbed by the potatoes which will be fully cooked by the time the water from the tomatoes evaporates.

Potato chutney

Servings

4

servings
Prep time

5

minutes
Cooking time

15

minutes

Ingredients

  • 500g ripe tomatoes, blitzed or 1 can of whole plum tomatoes

  • 1 onion, thinly sliced

  • 2 green chillies, slit in half

  • 2 cloves of garlic, thinly sliced

  • ½ tsp turmeric

  • 1 tsp curry powder

  • Oil

  • Salt

  • 2 potatoes, thinly sliced

Directions

  • Braise the onion and chilies on a medium heat in enough oil to coat the bottom of your pan, 3-4 tablespoons.
  • Once the onions are beginning to soften, add the garlic and fry until fragrant, then add in the spices and roast for a minute.
  • Add in the tomatoes and salt to taste. Bring to the boil then add in the potatoes. Mix well to combine, cover and allow to simmer, stirring regularly.
  • The tomatoes should start releasing some liquid, allow this to cook but the sauce should not be completely dry. Once the oil starts to separate and bubble through the chutney is done.

Turkey Meatballs in a butter makhani sauce

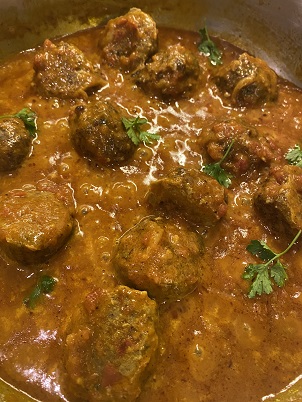
Turkey meatballs in a makhani sauce

Meatballs are one of my favourite things to cook because it is so versatile. A little change in flavour can take you to India, Italy or even Thailand. They cook incredibly fast, are super cost effective and depending on the type of meat used can also be very healthy.

It should come as no surprise that my go to is an Indian spiced version which has been adapted from my mom’s recipe and just lightened up a bit. My mom favours lamb but I have swapped this out for turkey which drastically reduces the fat content.

These can be served in a spicy tomato chutney or as I will be serving it today in a “butter chicken” sauce to change things up a little.

The recipe uses 500g of minced turkey and produces 24 meatballs.

Let’s get cooking…

Start by frying the onion in oil until golden then allowing it to cool. I like to fry the onion here so that meatball doesn’t become too soggy with the raw onion and there’s an extra bit of flavour brought in by the caramelized onion. Next, combine all the ingredients in a large bowl until it is well mixed.

Grease your hands and start to shape the meatballs into ping pong ball sizes. I find this size is perfect as it doesn’t dry out or become too “meaty” with not enough flavour. Bake at 200 for 20-25 minutes and add directly into a makhani sauce.

Turkey Meatballs in a butter makhani sauce

Servings

4

servings
Prep time

10

minutes
Cooking time

15

minutes

Ingredients

  • 500g turkey thigh mince

  • 1 large onion, finely diced

  • 1 tblsp mint, minced

  • 1 tblsp coriander, minced

  • 1 tblsp thyme, minced

  • 1 tblsp parsley, minced

  • 1 ½ tsp ginger and garlic paste

  • 1 tsp salt to taste

  • ¾ tsp pepper

  • ¾ tsp garam masala

  • 1 egg

Directions

  • Fry onion in oil until golden then allow it to cool
  • Combine all the ingredients in a large bowl until well mixed
  • Shape the meatballs into ping pong ball sizes
  • Bake at 200 for 20-25 minutes
  • Serve in a makhani sauce

Travel diary… Istanbul

Our trip to Turkey was quite an unexpected one. We were due to take a big family holiday and the destination was up for discussion. Up until this point all family holidays had been in Africa or Asia so I was definitely keen to change things up a little.

Many people at my office had started visiting Istanbul and after a little research I knew that it was a place that my parents and siblings would all enjoy.

Our hotel was ideally situated within walking distance of both the Hagia Sofia and the Blue Mosque. Naturally, these stops were first on our list of sights to see. Both are breath taking to say the least. I felt privileged to be in the presence of such grandeur with a lot of the intricate and elaborate design still intact.

Next up Basilica Cistern which has been around for nearly 17 centuries and is still in remarkable condition. These underground waterways are so legendary that movies have even been filmed here. Another definite must see. We also took a boat trip on the Bosphorus, wondered around Taksim and went up to Galata Tower to take in the sights from above.

Finally, the shopping… multiple hours were spent meandering through the little aisles of the Grand Bazaar and the Spice Bazaar. The colours, the smells, the people, the food… If there was one thing that made me fall in love with this city, these simple markets were it. Unbelievable pyramids of Turkish delight around every corner and it’s not the rose flavoured jelly stuff we grew up eating. Every flavour you can think of and each one more delicious than the one before.

The food stalls in the little alleyways served the best Doner kebabs and chips I have ever eaten packed with flavours and spices that we could see all around us.

One of my very favourite things about Turkey has to be the kaleidoscopic lamps made from stained glass. This more than anything else reminds me so much of this beautiful country no matter where I see it.

Turkey had left a lasting impression on me and should feature on your travel list if a dose of culture and delicious food is what you are looking for.

Tikka sausages

Tikka style sausages

Back in South Africa, spicy lamb and chicken sausages were staples in every household. I always had a stash of chicken tikka sausages in my freezer ready to be turned into a hearty sausage chutney, fried up for breakfast or grilled for an impromptu Sunday afternoon braai (a traditional South African BBQ).

Needless to say this is something we have really missed since moving to London. I have spent a few months trying to build and perfect a recipe that uses minced turkey thigh (for the fat content) and layering in different spices to get close to the spicy sausage we are used to. I must say though that I do not have a sausage filler so I’m shaping mine into chipolata style sausages (almost like shish kebab) and they do hold their shape quite nicely while frying but the taste is really what I am after.

Let’s get cooking…

Place the onion, chilli and coriander into a blender and blend until very fine, then squeeze out the moisture using kitchen roll. Add this to the mince along with all the other ingredients and mix well until all the ingredients are evenly distributed and mixed together. I like to fry a small amount to test for the seasoning and if I am happy then shape into little sausages. At this point you can fry it immediately or lay out on greaseproof paper and freeze.

Tikka sausages

Servings

4

servings
Prep time

10

minutes
Cooking time

15

minutes

Ingredients

  • 250g minced turkey

  • ½ onion

  • 4 green chillies

  • 1 tsp ginger and garlic paste

  • ¼ tsp ground coriander

  • ¼ tsp ground cumin

  • ¼ tsp garam masala

  • ¼ tsp grated nutmeg

  • ½ tsp kashmiri masala

  • 1 tsp curry powder

  • 1 tsp salt

  • ½ tsp pepper

  • 2 tblsp coriander

  • 1 tblsp olive oil

  • ½ tsp onion powder

  • ½ tsp garlic powder

Directions

  • Place the onion, chilli and coriander into a blender and blend until very fine, then squeeze out the moisture. Add to the mince along with all the other ingredients.
  • Mix well and form into long sausage like shapes.
  • Fry in oil or freeze on greaseproof paper.

Vegetable Biryani

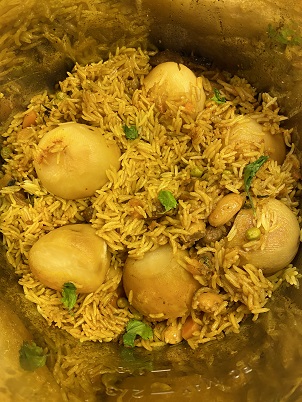
Vegetable biryani
Vegetable biryani

Growing up we would traditionally only have veg biryani at an Indian wedding, why this was the case I will never know but I am definitely changing that tradition. This is one pot wonder meal that typically tastes amazing with any number of a wide variety of vegetables. It’s healthy and very economical to make and perfect for packing in extra veg when it comes to picky eaters.

I take the simplicity one step further by making this is an Instant pot but the process is virtually the same on the stove top with just a slightly longer cooking period.

Let’s get cooking…

Start off by seasoning the potatoes with salt and a pinch of turmeric and roast in an oven until soft.

While this is cooking, turn on the Instant pot to sauté mode, braise onions and chilli in 4 tablespoons of oil until translucent. Add in chilli powders, ground spices, turmeric and ginger and garlic and stir until fragrant, careful not to burn it. Toss in the tomatoes, salt and chopped herbs. Allow to simmer for 5 minutes until the tomatoes are cooked (oil is bubbling to the top). Once you see this add in the vegetables and cook for 5 minutes, stirring regularly.

Layer the uncooked rice over the potatoes and pour over 1 ½ cups of water. Place potatoes on top of the rice and dab the butter all over. Close the lid, switch the Instant Pot to pressure cook and timer to 20 minutes.

When the time is up, allow to release the pressure for 10 minutes then manually release any remaining pressure. Open the pot, all the liquid should be soaked up and the rice fully cooked. If there is any remaining liquid, you can turn on the saute mode to allow the liquid to dry up.

Serve with raita and a simple carrot and onion salad.

Vegetable Biryani

Servings

6-8

servings
Prep time

10

minutes
Cooking time

40

minutes

Ingredients

  • 3 ripened tomatoes or 1/2 can whole plum tomatoes, blitzed

  • 1 large onion, finely sliced

  • 3 medium potatoes, cut in half and roasted

  • 4 sprigs mint

  • 4 sprigs thyme

  • 8 sprigs coriander

  • 2 green chillies

  • 1 cup rice

  • 1/2 cup frozen peas

  • 1 star anise

  • 4 cardamom pods

  • 2 sticks cinnamon

  • 1/2 tsp fennel seeds

  • 4 cloves

  • 2 bays leaves

  • 1/2 tsp Kashmiri chilli powder (optional)

  • 3 tsp medium curry powder (depending on your heat preference)

  • 1/2 tsp turmeric

  • 1/2 tsp ground cumin

  • 1/2 tsp ground coriander

  • 1/2 tsp ground fennel

  • 1 1/2 tsp salt to taste

  • 1 tsp crushed ginger and garlic

  • 4 cups of mixed vegetables, I used carrots, butter beans and mushrooms

  • 3 tblsp butter

  • 4 tblsp oil

Directions

  • Season potatoes with salt and a pinch of turmeric and roast until soft
  • Switch the instant pot to sauté mode, braise onions and chilli in 4 tblsp oil until translucent
  • Add in chilli powders, ground spices, turmeric and ginger and garlic and stir until fragrant, careful not to burn it
  • Add in tomatoes, salt and chopped herbs. Allow to simmer for 5 minutes
  • Once tomatoes are cooked (oil is bubbling to the top) add in the vegetables, cook for 5 minutes.
  • Layer the uncooked rice over the potatoes and pour over 1 ½ cups of water
  • Place potatoes on top of the rice and dab the butter all over
  • Close the lid, switch the Instant Pot to pressure cook and timer to 20 minutes
  • After the time is up, allow to release the pressure for 10 minutes then manually release any remaining pressure
  • 10. Open the pot, all the liquid should be soaked up and the rice fully cooked
  • 11. Once cooked, serve alongside raita and a simple carrot and onion salad.