Battered Aubergine

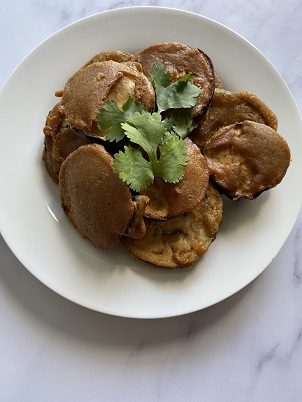
Battered aubergine
Battered aubergine

Some of my earliest Meat free Monday memories consist of the family, hanging around the kitchen and waiting for the freshly fried, batter aubergines to be done. Best eaten whilst hot and crisp, these would never last too long in our house and my mom would always make more than was required because she knew there would definitely be snacking before dinner.

These fritters are traditionally made in South Africa with “chilli bite mix” which is a spiced chickpea flour. The chickpea flour provides a very distinct flavour and the addition of crushed coriander seeds and a little curry powder takes the flavour to a different level of deliciousness.

Let’s get cooking…

I have substituted chickpea flour for sorghum flour. The taste is mostly similar but the flour isn’t flavoured in the same way that the chilli bite mix is so I flavour it on my own simply with garam masala, curry powder and a little salt.

Start off by mixing all the ingredients for the batter together in a large bowl. It should be quite thick in order to provide a nice, crisp coating to the aubergine. A batter that is too liquid would slide right off and not coat the vegetable.

Toss the aubergine slices in the batter so that all slices get a really nice, thick coating then fry in hot oil. Drop a little batter into the frying pan and if it sizzles, your oil is ready. I shallow fry the fritters but deep frying also works well.

Once done frying sprinkle with a little extra salt while it is still hot. These can be served as appetizers or alongside some dhall and rice for a wholesome meat free main dish.

Battered Aubergine

Servings

4

servings
Prep time

10

minutes
Cooking time

20

minutes

Ingredients

  • 1 large aubergine, sliced into ¼ cm round discs

  • ½ cup flour, I used sorghum flour

  • 1 tsp curry powder

  • 1 tsp salt

  • ½ tsp garam masala

  • ¾ cup water

Directions

  • Mix all ingredients for the batter together until it forms a thick consistency
  • Add the aubergine to the bowl, the batter should coat the slices quite thickly
  • Place into hot oil and shallow fry for 5 minutes per side
  • Remove from oil and drain on paper towels
  • Sprinkle with a little extra salt
  • Serve as an appetizer with a spicy dipping sauce or with dhall and rice as a great meat free Monday dish

“Wedding” dhall

Indian wedding dhall

Indian dhalls are some of the most comforting foods around. They’re cheap as chips to put together and pack in so much flavour and goodness and are also high in protein.

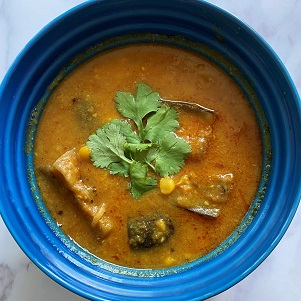
“Wedding dhall” as it is known in South Africa is traditionally made with split peas that are boiled and then braised with a vegetable masala base rather than the tadka. It is more brown in colour due to the masala and has a thicker consistency, this along with the addition of vegetables makes it the perfect once pot meal. Baby aubergine is the most common vegetable used in this dhall but it can also be made with cauliflower florets, green beans or squash.

The reason behind the rather unique name is because it was popularized by being a staple side dish at Indian weddings works beautifully well with biryanis or vegetable curries.

Let’s get cooking…

I use my instant pot to speed up the cooking time to minutes rather than hours, but if you don’t have one a normal pressure cooker or stove top boil would work just as well. All you need to do is get the pea dhall to a mashable consistency.

Begin by boiling the pea dhall with tomatoes, turmeric and garlic until soft and disintegrating. Once this has been done, saute onion, mustard seeds and cumin until translucent, add in the ginger and garlic paste and curry powder, fry until fragrant then add in the aubergine and a little salt to taste.

Pour in half a cup of water and cook until the aubergine is soft. You may need to add more water to ensure the aubergine is fully cooked and the masala does not burn. Once the aubergine is soft, 20-30 minutes, add in the pea dhall mixture. At this point you can add in more water if the mixture is too thick. The dhall should be a thick pouring consistency. You want bring it to a boil and then simmer for 10 minutes. Once you turn off the heat, add in a knob of butter or butter ghee and swirl through. Serve as the main dish with rice or as an accompaniment to other curries.

“Wedding” dhall

Servings

4

servings
Prep time

10

minutes
Cooking time

1

hour 

30

minutes

Ingredients

  • ½ cup pea dhall, soaked in water for an hour or overnight

  • 3 cloves of garlic

  • 1 tomato, finely diced

  • 1 tsp turmeric

  • ½ onion, thinly sliced

  • ½ tsp mustard seeds

  • ½ tsp cumin seeds

  • 1 tsp ginger and garlic

  • 1 tsp curry powder

  • 1 tblsp butter

  • 2 tblsp oil

  • ½ large aubergine, cut into 6 chunks or 6 small aubergines

Directions

  • Boil pea dhal with tomatoes, turmeric and garlic until soft
  • Saute onion, mustard seeds and cumin until translucent
  • Add ginger and garlic paste and curry powder, fry until fragrant then add in the aubergine and a little salt to taste. Cook until the aubergine is soft
  • Once this is cooked then add in the pea dhall mixture and a little water if it is too thick.
  • Add more salt to adjust the seasoning
  • The dhall should be a thick pouring consistency
  • Stir in the butter and serve.
  • Great as is just served with rice or accompanying any other veg curries

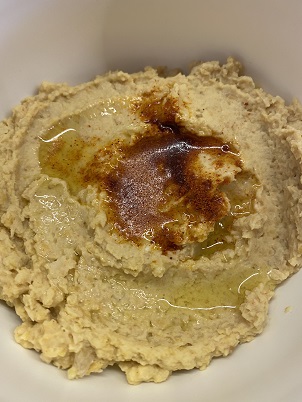
Hummus

Creamy hummus
Creamy hummus

Hummus is an easy dip to whip together with very little fuss and can be made mostly from pantry ingredients. It is great to use in sandwiches, on cheese boards or as a pre-dinner snack to prevent yourself from eating all the ingredients before dinner is cooked.

Packed with protein and being vegetable based means that this is very diet friendly but the is no compromise on flavour. I love serving it up with vegetable crisps or just carrot, bell pepper and cucumber crudité.

Let’s get cooking…

Soak and cook dried chickpeas or crack open a can of chickpeas, blend with the tahini, lemon juice and spices until smooth and creamy. You may need to add a little water to loosen the mixture. Lastly add olive and serve. This stores really well for up to 2 weeks in the refrigerator.

Hummus

Servings

4

servings
Prep time

10

minutes
Cooking time

30

minutes

Ingredients

  • 1 cup of dried chickpeas, cooked or 1 tin of chickpeas

  • 2 tsp tahini

  • Salt

  • ½ tsp cumin

  • ½ tsp paprika

  • 1 clove of garlic

  • ½ lemon, juiced

  • 3-4 tbsp olive oil

Directions

  • Soak chickpeas and boil until soft, skip this step if using tinned chickpeas
  • Blend all the ingredients, except olive oil, together with a little water, use some of the boiling/tinned water
  • Add olive oil as it is blending to loosen

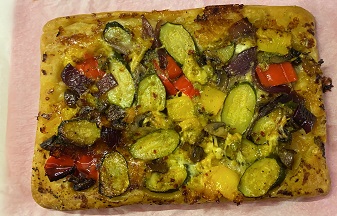
Jamie Oliver inspired Roast veg pizza

Jamie Oliver inspired roast veg pizza
roast veg pizza

It’s a Monday, not anyone’s favourite day of the week by any stretch of the imagination but it can be made so much better by having a speedy supper to look forward to. When Jamie Oliver released his then new cookbook Veg I remember the hype around his puff pastry pizza. I was determined to give this a try just because of how easy it looked.

Store bought shortcuts like readymade puff pastry and prepared roasting vegetables makes this even easier and quicker to rustle together.

Let’s get cooking…

Start off by chopping the veg into roughly 1cm sized pieces, you can use any veg that your family likes. My favourites for dishes like these are mushrooms, zucchini, bell peppers and red onions. Or if you are using ready prepared vegetables then skip straight to this step… Lay out the veg in a single layer on a baking sheet, use 2 trays if you need to because you don’t want to overcrowd the pan. Sprinkle liberally with olive oil, salt, pepper and some dried herbs and toss everything together to get all the veg coated in the seasoning. Throw on the garlic cloves but keep them in their skins to prevent burning.

Roast for 30 minutes then sprinkle over shredded or torn up fresh mozzarella. Place the puff pastry sheet over the vegetables and tuck the sides into the tray. Return tray to the oven and bake until golden.

Once it is done, remove from the oven and allow to cool for a few minutes then turn out onto to a board so that the vegetables are on top. Dollop over a little pesto and serve immediately!

Jamie Oliver inspired Roast veg pizza

Servings

4

servings
Prep time

10

minutes
Cooking time

40

minutes

Ingredients

  • 1 red onion, quartered

  • 2 courgette/ zucchini, thinly sliced

  • 2 bell peppers, I used red and yellow

  • 2 tblsp pesto

  • 1 tsp dried thyme

  • 1 sheet of store bought puff pastry

  • 1 cup of shredded mozzarella

  • Salt

  • Pepper

  • Olive oil

Directions

  • Toss vegetables with olive oil, salt, pepper and dried thyme, lay out in a single layer on a baking sheet and throw in the garlic with skins still on, roast for 30 minutes at 180
  • Sprinkle on mozzarella and tuck in puff pastry sheet over the vegetables and return to the oven for a further 30 minutes until pastry is golden
  • Once cooked, remove from oven, place a board over the tray and flip over. It should now look like a rectangular pizza
  • Dollop over pesto and serve

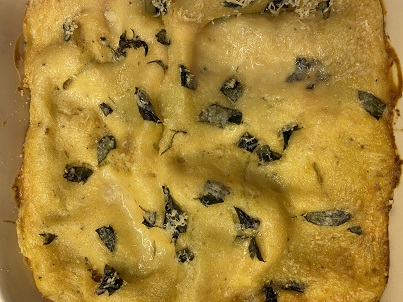
Roast vegetable lasagna

Roast veg lasagna
Roast veg lasagna

Roasted vegetables can be amazingly flavourful and satisfying if cooked correctly. Often people are faced with limp, soggy vegetables that are quite lacklustre which naturally creates a strong dislike for them. The key to great roasted veg is cooking it at a high temp and adequate seasoning. Caramelisation equals major flavour so don’t be afraid of any slightly charred edges.

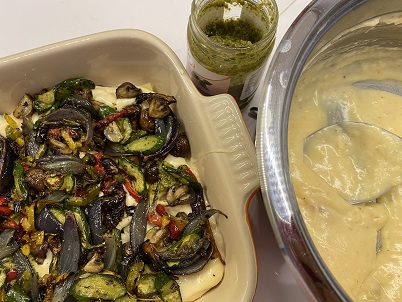
Roast veg lasagna assebmly
Roast veg lasagna assembly

I often try to incorporate roasted veg into my meat free Monday dishes as a quick way to get something delicious on the table that’s not boring. It’s a very adaptable ingredient that can be used easily to create a variety of different dishes.

Let’s get cooking…

Start off by chopping the veg into roughly 1cm sized pieces, you can use any veg that your family likes. My favourites for dishes like these are mushrooms, zucchini, bell peppers and red onions. Lay them out in a single layer on a baking sheet, use 2 trays if you need to because you don’t want to overcrowd the pan. Sprinkle liberally with olive oil, salt, pepper and some dried herbs and toss everything together to get all the veg coated in the seasoning. Throw on the garlic cloves but keep them in their skins to prevent burning.

While the vegetables roast you can start with the béchamel or white sauce. Melt the butter in a pan and add flour, stir continuously to allow the flour to cook, this removes the raw taste from the sauce. Once the mixture is bubbling and cooked through, add a little bit of the milk and whisk vigorously, then add in the remaining milk and whisk until thick. Season with salt and pepper and once the vegetables are done mash in the roasted garlic to the sauce and mix well to incorporate.

Now you’re ready to start layering the lasagne, place 2 tablespoons of the white at the bottom of a roasting dish, then add your first layer of lasagne noodles (I use a square oven proof dish which fits 2 sheets of lasagne perfectly). Spoon over half of the roasted vegetables and dot the pesto all over and cover with a third of the remaining béchamel. Repeat the layers ending with a layer of lasagne noodles and a final layer of béchamel. Sprinkle over some parmesan cheese and bake.

Serve with a leafy, vinegary salad to cut through the richness.

Roast vegetable lasagna

Servings

4

servings
Prep time

15

minutes
Cooking time

1

hour 

Ingredients

  • 1 portion of béchamel (white sauce)

  • 1 red onion, quartered

  • 2 courgette/ zucchini, thinly sliced

  • 2 bell peppers, I used red and yellow

  • Handful of mushrooms, quartered

  • 2 tblsp pesto

  • 1 tsp dried thyme

  • 6 lasagna sheets

  • Parmesan cheese

  • 3 cloves of garlic

  • Salt

  • Pepper

  • Olive oil

Directions

  • Toss vegetables with olive oil, salt, pepper and dried thyme, lay out in a single layer on a baking sheet and throw in the garlic with skins still on, roast for 30 minutes at 180
  • Once vegetables are cooked squeeze the garlic into the béchamel and mix well
  • Put 2 tablespoons of béchamel into the baking dish then a layer of lasagna sheets (only 2 sheets needed per layer)
  • Spoon on half the vegetables, dollop 1 tablespoon of pesto around and cover with a third of the béchamel
  • Repeat the layer then add a final layer of lasagna sheets, top with the last third of béchamel and parmesan cheese
  • Bake for 30 minutes at 180 degrees.

Wild mushroom paella

In my family we take Meat free Monday quite seriously, it being a religiously auspicious day is one of the main reasons why.

Over time I’ve tried to take some old favourites and find a vegetarian alternative so as to introduce some excitement into meat free meals. One such hit is my wild mushroom paella. I am not one for boring old button mushrooms so as far as possible I always use wild/exotic mushrooms to add a major boost of flavour and texture. However, any mushroom will do if you can’t find wild mushrooms.

Delicious and simple… Wild mushroom Paella

Let’s get cooking…

Start with the prep, all the veggies that go into this dish need to chopped and ready to go and likewise the remaining ingredients should ideally be measured out already so that nothing is missed along the way.

First up heat up 3-4 tablespoons of olive oil on a medium-low heat in a flat heavy based pan, I used a cast iron casserole but any pan will do, they key here is that the pan should be as flat as possible. Once the oil is hot throw in the diced onions, diced peppers and shaved fennel, cook until onions are translucent and starting to soften. Next add in the garlic and herbs, I like to pick off the leaves and mince it if you using fresh herbs so that there aren’t any huge pieces of stems floating around. You could also use dried herbs, in that case rub it between your as you sprinkle it into the pan.

Fry this until fragrant, the aroma of the garlic should be unmistakeable. Once this happens add in the tomato paste and paprika and stir around for 1 minute, the tomato paste needs to cook out in order to mellow out the flavour and add a rich undertone.

Add in 2 cups of Arborio or Spanish paella rice and stir until it is coated with all the spices and veg and has toasted a little. Add in the 4 cups of warm stock so as to not drastically reduce the heat in the pan, allow it to simmer for 10 minutes uncovered but stir regularly.

While the rice is bubbling away, heat up a second pan on high heat, melt a little butter in the pan the toss in the mushrooms, minced (or dried) thyme and season with salt and pepper. Sear the mushrooms until it is cooked and golden but be very careful not to burn it.

After the 10 minutes have elapsed, add the mushrooms to the rice along with 1 cup of warm water. Stir to incorporate everything and partially cover. Cook for a further 10 minutes without stirring. There will be a little crust of rice that develops at the bottom of the pan… this is paella gold! It is known as the Soccrat and is one of the key indicators of a good paella. After 10 minutes the rice should be cooked and most of the liquid should be absorbed. Remove from the heat and allow to rest for 10-15 minutes.

Then serve up with big green salad, roasted red peppers and chunks of bread.

Wild mushroom paella

Servings

4

servings
Prep time

10

minutes
Cooking time

40

minutes

Ingredients

  • 2 punnets mixed Wild mushrooms, chopped

  • 2 cups Arborio or Spanish paella rice

  • 1 bell pepper, I used red diced

  • 1 large onion, diced

  • 1 fennel bulb, shaved

  • 2 sprigs rosemary

  • 3 sprigs thyme

  • 4 cloves of garlic, crushed

  • 2 tsp paprika

  • 1 tbsp tomato paste

  • 4 cups veg stock

  • 1 cup water

  • Butter

  • Salt

  • Pepper

  • Olive oil

Directions

  • Fry onion, pepper and fennel in a little olive oil until soft
  • Add garlic and herbs and once they are fragrant add tomato paste and paprika and fry for 1 minute
  • Add 2 cups of paella or Arborio rice and fry
  • Once rice nicely covered in all the spices pour in 4 cups of stock, let it simmer uncovered for 10 minutes stirring occasionally
  • In a separate pan fry mushrooms in a little butter and thyme until golden, season to taste with salt and pepper
  • Add to the rice along with 1 cup of water
  • Cover and cook for a further 10 minutes
  • Take it off the heat and let it rest for 10 minutes before serving

Indian comfort food at its best… Kitchiri

Kitchiri- Ultimate warming, healing Indian style comfort food

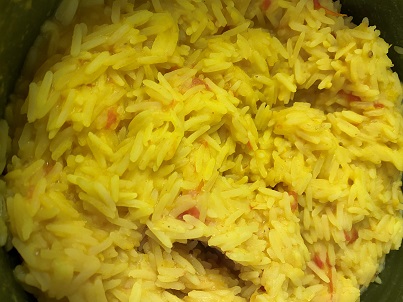
Kitchiri is quintessential Indian comfort food and it is a well know dish all across all of India and beyond. Most families have their own recipes but the basis of the meal is lentils and rice cooked together. The bright yellow buttery dish looks and tastes like sunshine in a bowl. Both my mom and my mom-in –law always serve it with a little bit of spicy tomato chutney to cut through the richness of the rice.

With just a handful of simple ingredients this is an extremely cost effective dish and relatively fuss free but there is no compromise on flavour. As an added bonus this dish is loaded with turmeric which is great for its anti-inflammatory properties.

Let’s get cooking…

The first is the longest step but it’s not really active cooking. Wash and rinse split peas and set it to boil. This will take about an hour but you’re looking for the right consistency rather than an exact time frame which could result in varying cooking times depending on a number of factors. You want the lentils to cook down until extremely soft and reduced to a paste like consistency. There is no way to overcook this so don’t be afraid.

A much faster way to get to the end result is to use a pressure cooker, I have an Instant Pot so this is what I used and all it took was 10 minutes.

Once the lentils are fully cooked you can start to boil the rice. I use a brown basmati which takes slightly longer to cook and does not disintegrate the way white basmati rice does. Cover the rice with a small amount of water and cook until it is half cooked. Most of the water should have evaporated by now also.

Add in the split pea mixture and add a little water to prevent it sticking to the bottom of the pot. This now needs to be watched carefully. Turn your heat down to the lowest and cook while stirring frequently and adding in a tablespoon of water at a time so that nothing burns. Continue until your rice is cooked. The consistency should be quite thick but not dry. In a small pan, fry the onion with the spices and chilli until fragrant then add it to the rice and stir thoroughly. Place blobs of butter in and stir to combine. Serve with a tomato chutney.

Indian comfort food at its best… Kitchiri

Servings

4

servings
Prep time

10

minutes
Cooking time

1

hour 

30

minutes

Ingredients

  • ½ cup yellow split peas

  • 1 cup rice

  • ½ onion, thinly sliced

  • 1 tsp cumin seeds

  • 1 dried red chilli (fresh chilli would also work)

  • 2 tbsp butter

  • 1 tbsp vegetable oil

Directions

  • Soak split peas for a few hours or overnight
  • Boil until soft (I used the Instant Pot to speed this up, it only takes 10 minutes), on the stove it would 1-1 ½ hours
  • Cover rice with 1 inch of water, add salt to taste and boil until half cooked, most of the water should cook out by this time also
  • Then add the split pea mixture, which should now be a thick paste, to the rice
  • Add a little water so that the rice does not stick to the pot
  • Turn heat to the lowest setting and cook together, stirring frequently, until the rice is cooked
  • In a frying pan braise the onion, chilli and cumin seeds in the oil and butter mixture until fragrant
  • Stir this into the rice
  • Serve with a spicy tomato chutney*