Ratatouille

Ratatouille
Ratatouille

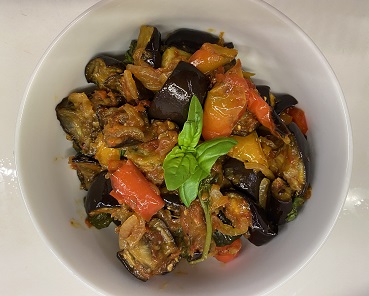
On a Monday morning fridge raid I realised I had all the ingredients for a simple ratatouille, a French vegetable and tomato stew that is brimming with flavour. My recipe is not traditionally French but it is inspired by the classic and is still very hearty and filling. It can be served as a side dish or over pasta to turn it into delicious meat free main.

Let’s get cooking…

Toss the diced aubergine with salt, pepper and olive oil and scatter onto a baking sheet. Do the same with the zucchini and peppers on a separate baking sheet. Bake both sheets of vegetables at 180 for 40-45 minutes until caramelised and golden brown.

While the veggies roast, sauté the onion in a little olive oil until translucent, add in the garlic and stir around for 30 seconds then add in the finely pulsed tomatoes. Season generously with salt and pepper and allow to bubble away on medium to low heat until the sauce has reduced by half. Once the sauce has reduced, add in some crushed red pepper flakes according to your heat preference.

Stir through the vegetables once those are ready and simmer for 10 minutes so that the flavours really mix together. Turn of the heat and tear in a handful of basil leaves. Serve over your favourite pasta.

Ratatouille

Servings

4

servings
Prep time

10

minutes
Cooking time

1

hour 

Ingredients

  • 4-6 cloves fresh garlic, chopped

  • ½ onion diced

  • 6 large tomatoes blitzed

  • Basil

  • Salt

  • Pepper

  • Crushed red pepper flakes

  • Olive oil

  • 1 large aubergine, diced

  • 1 large zuchinni, diced

  • 2 peppers, diced

Directions

  • Toss the diced aubergine with salt, pepper and olive oil and scatter onto a baking sheet
  • Do the same with the zuchinni and peppers on a separate baking sheet
  • Bake both sheets of vegetables at 180 for 40-45 minutes until caramelised and golden brown
  • While the veggies roast, saute the onion in a little olive oil until translucent, add in the garlic and stir around for 30 seconds then add in the finely pulsed tomatoes
  • Season generously with salt and pepper and allow to bubble away on medium to low heat until the sauce has reduced by half
  • Once the sauce has reduced, add in some crushed red pepper flakes according to your heat preference
  • Stir through the vegetables once those are ready and simmer for 10 minutes so that the flavours really mix together.
  • Turn of the heat and tear in a handful of basil leaves.
  • Serve over your favourite pasta.
Cheesy garlic bread

Cheesy garlic bread
Cheesy garlic bread

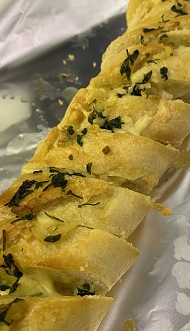
Garlic bread is a household favourite that can be paired with so many dishes and it rounds of the meal perfectly.

I love serving it with crumbed mushrooms as for a perfectly light meat free lunch or dunked into the creamy sauce from a big bowl of prawns or mussels. And it goes without saying that any and all Italian dishes are instantly elevated with a slice of garlic bread to mop up all the tomatoey juices.

Let’s get cooking…

Combine the butter, garlic and parsley in a bowl and mash together. Slice the baguette diagonally but not all the way through.

Using a teaspoon, spoon the butter mixture between each slice. Try to spread it out so that there are no dry spots of bread after baking. Sprinkle a little cheese between each slice and some over the top of the baguette.

Bake at 180 for 10-15 until the butter and cheese have melted and the bread is crisp

Use dairy free butter and cheese to make this vegan.

Cheesy garlic bread

Servings

6

servings
Prep time

10

minutes
Cooking time

15

minutes

Ingredients

  • 1 baguette

  • 2-3 large cloves of garlic, minced

  • 100g butter, softened

  • 2 tblsp parsley, finely chopped

  • 1/2 cup cheddar cheese

Directions

  • Combine the butter, garlic and parsley in a bowl and mash together
  • Slice the baguette diagonally but not all the way through
  • Using a teaspoon, spoon the butter mixture between each slice. Try to spread it out so that there are no dry spots of bread after baking
  • Sprinkle a little cheese between each slice and some over the top of the baguette
  • Bake at 180 for 10-15 until the butter and cheese have melted and the bread is crisp

Heirloom tomato salad

Heirloom tomato salad

I, along with many of you I’m sure, am still trying to hold onto the last few days of summer. A quick trip to the market on Saturday helped me to do just that. I found some amazing heirloom tomatoes and just had to have them.

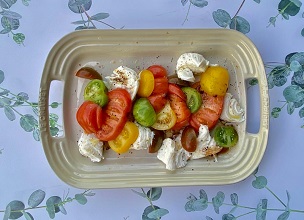
As always I leave the tomatoes out for a day or 2 to ripen further just to develop the maximum flavour and then I gave it some love with the simplest ingredients just to bring out the sweetness of the tomatoes.

Simply sliced and served with torn fresh mozzarella and dressed with olive oil, balsamic vinegar, crushed basil, salt and pepper this makes the perfect side and brings back all the memories of a great summer. Definitely one to try if you can get your hands on some late summer tomatoes.

Vegetarian Savoury mince Pies

Vegetarian savoury mince pie

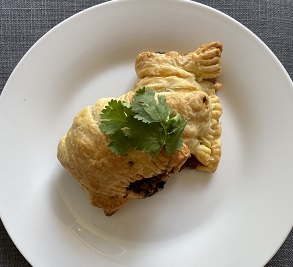
Some days meat free Mondays just needs to be simple and uncomplicated. For days like this i always have a roll of gluten free puff pastry ready in my freezer, ready to be transformed into something delicious!

This week there was actually very little cooking involved, I had a portion of already cooked spicy vegetarian mince in the freezer. A quick defrost of the pastry and mince and I had a batch of really delicious effortless savoury mince pies ready for the oven. The recipe for the mince couldn’t be simpler but if you’d like to steer away from soya than finely diced mushrooms or lentils would be great substitutes also.

Let’s get cooking…

Start by frying the onions in oil until soft. Add in turmeric, Kashmiri chilli powder and curry powder and fry for a few seconds then add ginger and garlic paste and fry until fragrant. Add in tomatoes and cook for 5 minutes, the oil should look like it is bubbling to the top, mash the tomatoes so that it forms a paste like consistency and stir in the mince with the garam masala and salt.

Allow to saute for 5-10 minutes then add in ½ cup water and handful of peas. Simmer on low-medium heat until almost all the water has dried up. Garnish with coriander and allow to cool.

Once the filling has cooled or been fully defrosted if it was already prepared, you can roll out the puff pastry and cut it into 12 equal rectangles.

Place about 1 tablespoon of the filling into the centre of each rectangle then fold the short edge over and crimp with a fork to seal. Bake at 180 until golden, approximately 30 minutes. Enjoy with a side of chillli sauce to dip into.

Vegetarian Savoury mince Pies

Servings

4

servings
Prep time

10

minutes
Cooking time

50

minutes

Ingredients

  • 1 portion of plant based mince

  • ½ onion, finely sliced

  • 1 small tomato, pureed

  • 1 tsp ginger and garlic past, or you can crush ginger and garlic separately

  • ½ tsp garam masala

  • ¼ tsp turmeric

  • ½ tsp Kashmiri chilli powder

  • 2 tsp curry powder, depends on heat preference

  • 2 tbsp oil, coconut or vegetable oil

  • Salt to taste

  • 1 tsp coriander, chopped

  • Handful of frozen peas

  • 1 sheet puff pastry

Directions

  • Fry onion in oil until soft
  • Add in turmeric, Kashmiri chilli powder and curry powder and fry for a few seconds then add ginger and garlic paste and fry until fragrant
  • Add in tomatoes and cook for 5 minutes, the oil should look like it bubbling to the top
  • Add in mince salt and garam masala and stir thoroughly
  • Allow to saute for 5-10 minutes then add in ½ cup water and peas.
  • Simmer on low-medium heat until water has evaporates.
  • Garnish with coriander, allow to cool
  • Once the filling has cooled or been fully defrosted if it was already prepared, you can roll out the puff pastry and cut it into 12 equal rectangles.
  • Place about 1 tablespoon of the filling into the centre of each rectangle then fold the short edge over and crimp with a fork to seal. Bake at 180 until golden, approximately 30 minutes. Enjoy with a side of chillli sauce to dip into.

Baba ghanoush

Baba ghanoush
Baba ghanoush

Inspired by my trip to Turkey, I decided to create some of my favourite dishes from my time travelling around the beautiful city of Istanbul.

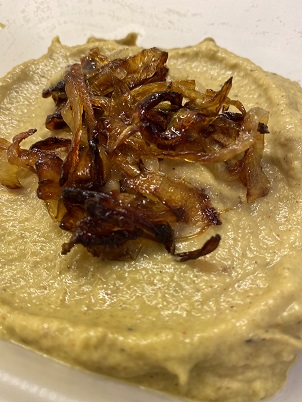
Turkish food for me in synonymous with vegetable based dips, my favourite being baba ghanoush. A rich and deeply flavoured roasted aubergine dip that is so moreish and versatile. I personally love it for mid afternoon snacking, it’s so delicious that it’s easy to forget that this dip is also very healthy.

Let’s get cooking…

Slice an aubergine in half, lengthwise and score the flesh in a diamond pattern. Brush with olive oil and season. Bake at 180 for 45 minutes until the aubergine is very tender. You can also throw 3 garlic cloves into the roasting dish. Allow it to cool just enough so that you can handle it. scoop out the flesh and pop into a blender with tahini, lemon juice, salt, roasted garlic, salt and pepper. Blend it all together until smooth and creamy.

Serve with crackers or crudites and enjoy.

Baba ghanoush

Servings

6

servings
Prep time

5

minutes
Cooking time

45

minutes

Ingredients

  • 1 large aubergine

  • 2 cloves garlic

  • 1 tsp tahini

  • ½ tsp cumin powder

  • 1 tblsp lemon juice

  • Olive oil to thin

Directions

  • Cut aubergine in half and score in a diamond pattern, season
  • Roast at 180 for 40-45 minutes
  • Scoop out flesh, blend with the remaining ingredients
  • Add caramelized onions, optional

Hummus

Creamy hummus
Creamy hummus

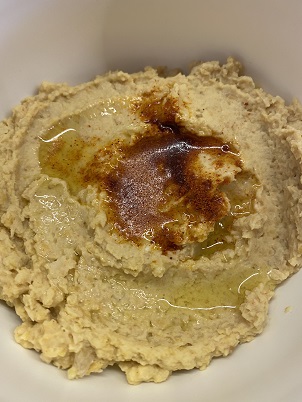
Hummus is an easy dip to whip together with very little fuss and can be made mostly from pantry ingredients. It is great to use in sandwiches, on cheese boards or as a pre-dinner snack to prevent yourself from eating all the ingredients before dinner is cooked.

Packed with protein and being vegetable based means that this is very diet friendly but the is no compromise on flavour. I love serving it up with vegetable crisps or just carrot, bell pepper and cucumber crudité.

Let’s get cooking…

Soak and cook dried chickpeas or crack open a can of chickpeas, blend with the tahini, lemon juice and spices until smooth and creamy. You may need to add a little water to loosen the mixture. Lastly add olive and serve. This stores really well for up to 2 weeks in the refrigerator.

Hummus

Servings

4

servings
Prep time

10

minutes
Cooking time

30

minutes

Ingredients

  • 1 cup of dried chickpeas, cooked or 1 tin of chickpeas

  • 2 tsp tahini

  • Salt

  • ½ tsp cumin

  • ½ tsp paprika

  • 1 clove of garlic

  • ½ lemon, juiced

  • 3-4 tbsp olive oil

Directions

  • Soak chickpeas and boil until soft, skip this step if using tinned chickpeas
  • Blend all the ingredients, except olive oil, together with a little water, use some of the boiling/tinned water
  • Add olive oil as it is blending to loosen

Mince samoosas

Mince samoosas
Mince samoosas

Mince samoosas

Servings

4

servings
Prep time

20

minutes
Cooking time

30

minutes

Ingredients

  • 250 g mince, I used turkey but lamb, beef or chicken would also work

  • 1 onion, finely diced

  • 4 chillies, finely chopped

  • 1 tsp ginger and garlic past, or you can crush ginger and garlic separately

  • ½ tsp ground cumin

  • ½ tsp ground coriander seed

  • ½ tsp garam masala

  • ½ tsp Kashmiri chilli powder

  • 2 tbsp oil, coconut or vegetable oil

  • Salt to taste

  • 2 tblsp coriander, chopped

  • 2 tblsp mint, chopped

Directions

  • Fry mince and chillies in oil for 5 minutes, then add ginger and garlic, spice pwders and cook until fragrant
  • Once cooked, add the onion and cook until the water evaporates but the onion is not fully cooked thorugh
  • Let it cool then add in the herbs
  • Cut filo pastry sheets into 7cm wide strips
  • Put a table spoon of the mince mixture onto the bottom of a strip, the fold the left corner upwards to create a triangle
  • Keep folding until you have a full triangle, seal the end with a paste of flour and water
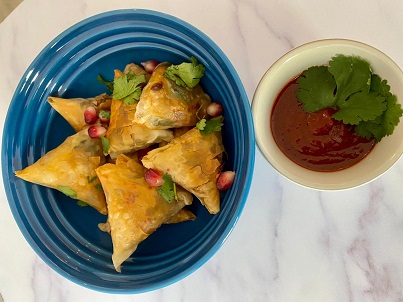
  • To fry, pour 1 cm of oil into a frying pan on medium heat, once the oil is hot place samosas in and fry until golden, flipping once, drain on kitchen paper
  • Serve warm with a spicy dipping sauce
  • To freeze: Arrange on the baking sheet then freeze
  • 10. Once frozen transfer to reusable ziploc bags

Indian comfort food at its best… Kitchiri

Kitchiri- Ultimate warming, healing Indian style comfort food

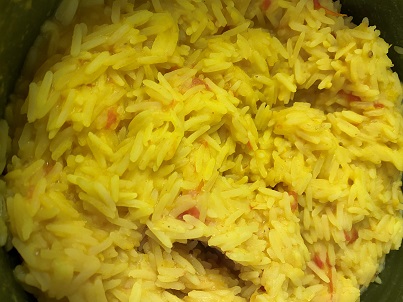
Kitchiri is quintessential Indian comfort food and it is a well know dish all across all of India and beyond. Most families have their own recipes but the basis of the meal is lentils and rice cooked together. The bright yellow buttery dish looks and tastes like sunshine in a bowl. Both my mom and my mom-in –law always serve it with a little bit of spicy tomato chutney to cut through the richness of the rice.

With just a handful of simple ingredients this is an extremely cost effective dish and relatively fuss free but there is no compromise on flavour. As an added bonus this dish is loaded with turmeric which is great for its anti-inflammatory properties.

Let’s get cooking…

The first is the longest step but it’s not really active cooking. Wash and rinse split peas and set it to boil. This will take about an hour but you’re looking for the right consistency rather than an exact time frame which could result in varying cooking times depending on a number of factors. You want the lentils to cook down until extremely soft and reduced to a paste like consistency. There is no way to overcook this so don’t be afraid.

A much faster way to get to the end result is to use a pressure cooker, I have an Instant Pot so this is what I used and all it took was 10 minutes.

Once the lentils are fully cooked you can start to boil the rice. I use a brown basmati which takes slightly longer to cook and does not disintegrate the way white basmati rice does. Cover the rice with a small amount of water and cook until it is half cooked. Most of the water should have evaporated by now also.

Add in the split pea mixture and add a little water to prevent it sticking to the bottom of the pot. This now needs to be watched carefully. Turn your heat down to the lowest and cook while stirring frequently and adding in a tablespoon of water at a time so that nothing burns. Continue until your rice is cooked. The consistency should be quite thick but not dry. In a small pan, fry the onion with the spices and chilli until fragrant then add it to the rice and stir thoroughly. Place blobs of butter in and stir to combine. Serve with a tomato chutney.

Indian comfort food at its best… Kitchiri

Servings

4

servings
Prep time

10

minutes
Cooking time

1

hour 

30

minutes

Ingredients

  • ½ cup yellow split peas

  • 1 cup rice

  • ½ onion, thinly sliced

  • 1 tsp cumin seeds

  • 1 dried red chilli (fresh chilli would also work)

  • 2 tbsp butter

  • 1 tbsp vegetable oil

Directions

  • Soak split peas for a few hours or overnight
  • Boil until soft (I used the Instant Pot to speed this up, it only takes 10 minutes), on the stove it would 1-1 ½ hours
  • Cover rice with 1 inch of water, add salt to taste and boil until half cooked, most of the water should cook out by this time also
  • Then add the split pea mixture, which should now be a thick paste, to the rice
  • Add a little water so that the rice does not stick to the pot
  • Turn heat to the lowest setting and cook together, stirring frequently, until the rice is cooked
  • In a frying pan braise the onion, chilli and cumin seeds in the oil and butter mixture until fragrant
  • Stir this into the rice
  • Serve with a spicy tomato chutney*