Nando’s style spicy strips and rice

Nando's style spicy strips and rice
Nando’s style spicy strips and rice

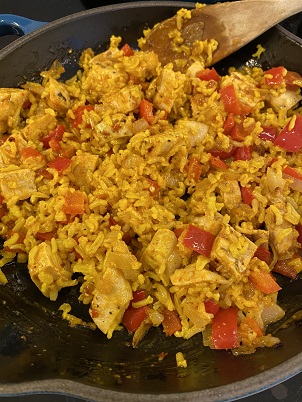
My very favourite take out meal is a box of Nando’s spicy chicken strips and rice. Now since we’ve all been put under lockdown and restaurants have had to close I have been missing the convenience of the occasional take out meal. I’m not a huge fan of takeout but the attraction for me is not having to bustle about the kitchen for long periods of time.

Recently while trying to clean out my heaving fridge, I realised that I had some leftover rice and chicken. I instantly thought of the Nando’s meal and my lunch blues were sorted.

This meal is super easy to put together if you have leftovers but can also be freshly prepared with very little effort.

Let’s get cooking…

Fry some onion and pepper in a little oil until starting to brown and soften. Stir the saffron into the rice and set aside. Add the chicken into the pan with onions and peppers and stir until it’s warmed through and coated in all the flavourings. Add the Nando’s sauce to coat everything then add the rice. Once everything is warm, serve and enjoy.

Nando’s style spicy strips and rice

Servings

2

servings
Prep time

10

minutes
Cooking time

10

minutes

Ingredients

  • Leftover cooked rice

  • 250g Leftover cooked chicken, roughly 1 breast fillet

  • 2 tblsp Nando’s sauce

  • ½ onion, diced

  • 1 red bell pepper, diced

  • 1 tsp peri-peri seasoning

  • Pinch of ground saffron or turmeric

  • Salt

  • Pepper

  • Oil

Directions

  • Fry onion and pepper in some oil with the spices until soft.
  • Stir the saffron into the rice
  • Add chicken into the pan with onions and peppers and stir until it’s warmed through
  • Add the Nando’s sauce to coat everything then the rice
  • Once everything is warm, serve and enjoy.
Simple pan fried fish

Simple pan fried fish

A pack of fish fillets is one of the best freezer staples to keep around. I always have a few in my freezer. You can have dinner on the table in 15 minutes if you’re in a pinch and it will be delicious to boot.

Incorporating fish into your diet also has many health benefits and this is a very cost effective way to do so.

Let’s get cooking…

Fillets of fish would be ideal here but if you don’t have that you can use the whole fish or whatever cuts you have and just adjust the cooking time accordingly. As a rule of thumb, fish should always be cooked in under 15 minutes so that it remains tender regardless of the thickness.

Rinse and pat the fish dry then season very liberally with salt and pepper on both sides. While you do this heat up a tablespoon of oil in a frying pan. Once the oil is hot, gently place the fillets in skin side down. You want to hear a sizzle.

My fillets are quite thin so I fry for 4 minutes on the first side, then flip it carefully and fry for a further 3 minutes. The fish should just begin to flake then you know it’s done.

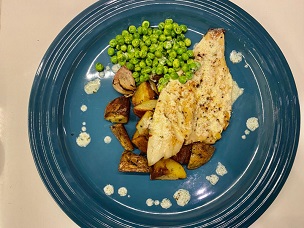
I served it up with pan fried potatoes and minty peas, drizzled with a little lemon, butter sauce.

Simple pan fried fish

Servings

2

servings
Prep time

5

minutes
Cooking time

15

minutes

Ingredients

  • Salt

  • Pepper

  • 2 fillets of fish, I used sea bass

  • 1 tblsp oil for frying

Directions

  • Rinse the fish and pat dry, then season generously with salt and pepper
  • Heat up a frying pan and once hot pour in the oil
  • Place the fillets skin side down. You should hear a good sizzle
  • The cooking time of the fish will vary depending on how thick your fillet is. Mine were quite thin so sear for 4 minutes on the skin side then a further 3 minutes on the flesh side and allow to rest

Battered Aubergine

Battered aubergine
Battered aubergine

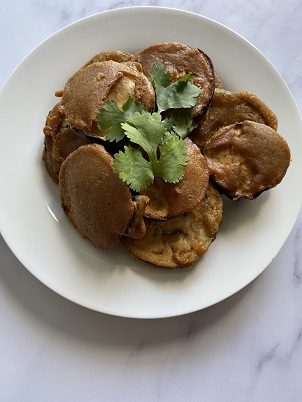
Some of my earliest Meat free Monday memories consist of the family, hanging around the kitchen and waiting for the freshly fried, batter aubergines to be done. Best eaten whilst hot and crisp, these would never last too long in our house and my mom would always make more than was required because she knew there would definitely be snacking before dinner.

These fritters are traditionally made in South Africa with “chilli bite mix” which is a spiced chickpea flour. The chickpea flour provides a very distinct flavour and the addition of crushed coriander seeds and a little curry powder takes the flavour to a different level of deliciousness.

Let’s get cooking…

I have substituted chickpea flour for sorghum flour. The taste is mostly similar but the flour isn’t flavoured in the same way that the chilli bite mix is so I flavour it on my own simply with garam masala, curry powder and a little salt.

Start off by mixing all the ingredients for the batter together in a large bowl. It should be quite thick in order to provide a nice, crisp coating to the aubergine. A batter that is too liquid would slide right off and not coat the vegetable.

Toss the aubergine slices in the batter so that all slices get a really nice, thick coating then fry in hot oil. Drop a little batter into the frying pan and if it sizzles, your oil is ready. I shallow fry the fritters but deep frying also works well.

Once done frying sprinkle with a little extra salt while it is still hot. These can be served as appetizers or alongside some dhall and rice for a wholesome meat free main dish.

Battered Aubergine

Servings

4

servings
Prep time

10

minutes
Cooking time

20

minutes

Ingredients

  • 1 large aubergine, sliced into ¼ cm round discs

  • ½ cup flour, I used sorghum flour

  • 1 tsp curry powder

  • 1 tsp salt

  • ½ tsp garam masala

  • ¾ cup water

Directions

  • Mix all ingredients for the batter together until it forms a thick consistency
  • Add the aubergine to the bowl, the batter should coat the slices quite thickly
  • Place into hot oil and shallow fry for 5 minutes per side
  • Remove from oil and drain on paper towels
  • Sprinkle with a little extra salt
  • Serve as an appetizer with a spicy dipping sauce or with dhall and rice as a great meat free Monday dish

Mango Mojito

Mango mojito
Mango mojito

Mojito’s are just about the most refreshing drink to have on a hot summer’s day. The minty freshness combined with the ice and lime is perfection.

I like to change things up a little and flavour up my traditional mojito recipe and what better to get in a double win than to combine the deliciousness of a mojito with the sweet goodness of mangoes. Mangoes have to be my all-time favourite fruit and when it is in season I try to incorporate it as much as possible.

Let’s get mixing…

Start off with a traditional mojito mix, muddle together the mint, lime and sugar until fragrant. Add in the rum and some mango puree if you have it or if not mango juice will do. Stir well to combine. Fill your glass with crushed ice and top with lemonade.

The best part… garnish with a mango wedge and once you’ve downed your mojito, tuck into the rum infused mango. Just delicious!

Mango Mojito

Servings

2

servings
Prep time

5

minutes
Cooking timeminutes

Ingredients

  • ½ tsp brown sugar

  • 4-5 mint leaves, plus more to garnish

  • 1 lime cut into wedges

  • Double shot of white rum

  • Lemonade

  • 75 ml of mango juice

  • Ice to serve

  • Slice of mango to garnish

Directions

  • Muddle mint, lime and sugar until fragrant.
  • Add in ice and pour over rum and mango juice, stir to combine then top with lemonade
  • Garnish with mango wedge and mint

Chicken Kalya

Chicken kalya
Chicken Kalya

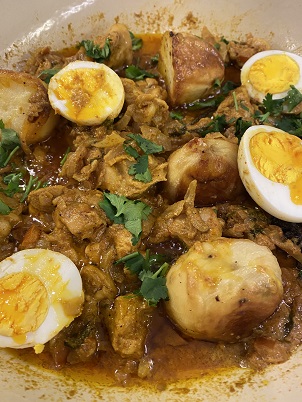
Chicken Kalya is a Pakistani chicken curry that has the most gorgeous deep, rich flavour that comes from the caramelized onions but is actually very light and surprisingly easy to prepare.

The first time I had ever tasted or even heard of this dish was on a sunny Sunday out at the beach in Durban, South Africa. My mon’s friend had come fully prepared with a picnic basket that contained this amazing curry and I have been wanting to recreate it ever since.

It’s taken me a few years to actually get started but I’ve finally come up with a version that is so moreish and satisfying, it will have you hooked.

Let’s get cooking…

The process seems to be a bit arduous but it’s a lot of idle time in between. The key here is to marinade the chicken for as long as possible so that the flavour is really infused and the meat is meltingly tender. First up, fry your sliced onions until golden and crisp. You’ll know that you’re on the right track with the onions because the smell that permeates throughout the kitchen is heavenly. While the onions are frying you can start to mix together the other ingredients for the marinade. Add in the onions when they are ready and toss everything together to coat all the pieces of chicken with the herbs, spices and yoghurt. Pop into the fridge and forget about it for at least 4 hours or overnight if you can.

 When you’re ready to cook, begin by peeling and halving the potatoes. Toss them with oil and salt and roast until tender. This step usually requires frying but I find that roasting is a lot healthier, less messy and time consuming and it produces the same results as oven roasting. You’re after a crisp exterior and fluffy, soft interior. Next boil a few eggs.

While these are roasting, start braising the kalya. Add whole spices to the oil that you fried the onions in, this adds even more flavour to the dish. Then add in the marinated chicken with all of the marinade. Cook on a medium heat, stirring regularly and adding a little water if the sauce dries out too much before the meat is cooked, the marinade should create a lovely thick sauce. Once the chicken is cooked add in the boiled eggs and roasted potatoes, toss to coat in the sauce and remove from the heat. This should be served with saffron rice or roti’s to mop up all the luscious gravy.

Alternatives, can be cooked using lamb, or soya pieces for a vegetarian option. The addition of lentils to the sauce would bump up the heartiness and stretch this meal further.

Chicken Kalya

Servings

4

servings
Prep time

30

minutes
Cooking time

1

hour 

Ingredients

  • 1 kg chicken, about 4 thighs and 4 drumsticks

  • 1tsp ground cumin

  • 1 tsp ground coriander

  • 1 tsp chilli powder

  • ½ tsp turmeric

  • ½ tsp garam masala

  • 2 tsp ginger and garlic paste

  • 1 tblsp chopped mint

  • 1 tblsp chopped coriander

  • ½ cup yoghurt

  • Salt to taste

  • 2 tblsp lemon juice

  • 3 tomatoes, grated/pureed

  • 1 green chilli

  • 2 large onions, thinly sliced and fried then added to the meat mix

  • 2 large potatoes, quartered

  • 3 boiled eggs

  • 3 cardomom pods

  • 3 cloves

  • 2 bay leaves

  • 2 cinnamon sticks

Directions

  • Marinade the chicken with the above ingredients and the onions for a few hours or overnight
  • Toss the potatoes in 1 tblsp oil and salt and roast for 40-50 minutes until cooked and golden
  • Add whole spices to the oil that you fried the onion in then add the meat mixture
  • Cook on a low heat until fully cooked but not dry. There should be a lovely thick sauce
  • Add in the roasted potatoes and boiled eggs and toss with the gravy
  • Serve with saffron rice or rotis

“Wedding” dhall

Indian wedding dhall

Indian dhalls are some of the most comforting foods around. They’re cheap as chips to put together and pack in so much flavour and goodness and are also high in protein.

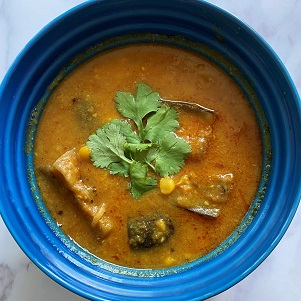
“Wedding dhall” as it is known in South Africa is traditionally made with split peas that are boiled and then braised with a vegetable masala base rather than the tadka. It is more brown in colour due to the masala and has a thicker consistency, this along with the addition of vegetables makes it the perfect once pot meal. Baby aubergine is the most common vegetable used in this dhall but it can also be made with cauliflower florets, green beans or squash.

The reason behind the rather unique name is because it was popularized by being a staple side dish at Indian weddings works beautifully well with biryanis or vegetable curries.

Let’s get cooking…

I use my instant pot to speed up the cooking time to minutes rather than hours, but if you don’t have one a normal pressure cooker or stove top boil would work just as well. All you need to do is get the pea dhall to a mashable consistency.

Begin by boiling the pea dhall with tomatoes, turmeric and garlic until soft and disintegrating. Once this has been done, saute onion, mustard seeds and cumin until translucent, add in the ginger and garlic paste and curry powder, fry until fragrant then add in the aubergine and a little salt to taste.

Pour in half a cup of water and cook until the aubergine is soft. You may need to add more water to ensure the aubergine is fully cooked and the masala does not burn. Once the aubergine is soft, 20-30 minutes, add in the pea dhall mixture. At this point you can add in more water if the mixture is too thick. The dhall should be a thick pouring consistency. You want bring it to a boil and then simmer for 10 minutes. Once you turn off the heat, add in a knob of butter or butter ghee and swirl through. Serve as the main dish with rice or as an accompaniment to other curries.

“Wedding” dhall

Servings

4

servings
Prep time

10

minutes
Cooking time

1

hour 

30

minutes

Ingredients

  • ½ cup pea dhall, soaked in water for an hour or overnight

  • 3 cloves of garlic

  • 1 tomato, finely diced

  • 1 tsp turmeric

  • ½ onion, thinly sliced

  • ½ tsp mustard seeds

  • ½ tsp cumin seeds

  • 1 tsp ginger and garlic

  • 1 tsp curry powder

  • 1 tblsp butter

  • 2 tblsp oil

  • ½ large aubergine, cut into 6 chunks or 6 small aubergines

Directions

  • Boil pea dhal with tomatoes, turmeric and garlic until soft
  • Saute onion, mustard seeds and cumin until translucent
  • Add ginger and garlic paste and curry powder, fry until fragrant then add in the aubergine and a little salt to taste. Cook until the aubergine is soft
  • Once this is cooked then add in the pea dhall mixture and a little water if it is too thick.
  • Add more salt to adjust the seasoning
  • The dhall should be a thick pouring consistency
  • Stir in the butter and serve.
  • Great as is just served with rice or accompanying any other veg curries

Easy chicken stirfry

Easy chicken stir fry

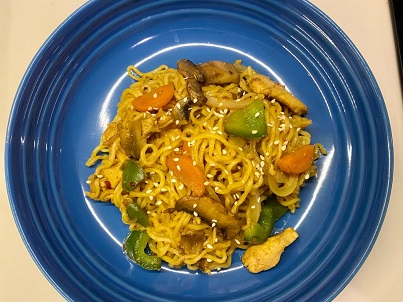
This meal is inspired by one of my favourite take-out meals in South Africa. It is a chicken, garlic and chilli noodle dish that is just so moreish. It is a very adaptable recipe so you can swap in any veg that you like and also any type of protein. Or just leave out the meat based protein to keep it vegetarian.

This is the perfect weeknight supper, it is so quick and easy and comes together in in less than 30 minutes.

Let’s get cooking…

Get your wok or frying pan onto a really high heat, add in some vegetable oil and a few drops of sesame oil for flavour. Once the oil is good and hot add in the very thinly sliced chicken and season immediately with a little salt. Add in the veg as soon as the chicken starts to get some colour and stir around for about 5 minutes. The veg should still have a bit of a bite. Add in the cooked noodles to the pan, instant ramen noodles works very well here also.

In a separate bowl mix together the ingredients for the marinade. Pour it into the pan with the chicken, veg and noodles and toss quickly to coat everything with the sauce. Serve immediately with a sprinkle of toasted sesame seeds.

Easy chicken stirfry

Servings

2

servings
Prep time

10

minutes
Cooking time

20

minutes

Ingredients

  • 3 cups of assorted vegetables, cut into similar sized pieces

  • 1 large/ 2 small chicken breasts, thinly sliced

  • 1 tsp honey

  • 3 tblsp soy sauce

  • 1 tsp sesame oil

  • 1 tsp crushed ginger and garlic

  • 1 tsp lemon juice

  • ½ tsp miso paste (optional)

  • 1 tsp sambal olek

  • Salt

  • Oil

  • 2 single serving packs of ramen, cooked according to the instructions

Directions

  • Add vegetable oil to wok and a few drops of sesame oil
  • Stirfry the chicken with salt
  • Add veg and cook for 5 minutes, I used onion, peppers, mushrooms and carrots
  • Add cooked noodles and sauce mixture, toss to coat
  • Serve immediately topped with some sesame seeds

Hummus

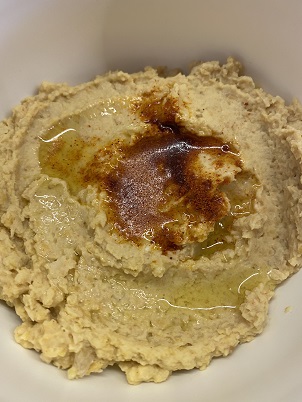
Creamy hummus
Creamy hummus

Hummus is an easy dip to whip together with very little fuss and can be made mostly from pantry ingredients. It is great to use in sandwiches, on cheese boards or as a pre-dinner snack to prevent yourself from eating all the ingredients before dinner is cooked.

Packed with protein and being vegetable based means that this is very diet friendly but the is no compromise on flavour. I love serving it up with vegetable crisps or just carrot, bell pepper and cucumber crudité.

Let’s get cooking…

Soak and cook dried chickpeas or crack open a can of chickpeas, blend with the tahini, lemon juice and spices until smooth and creamy. You may need to add a little water to loosen the mixture. Lastly add olive and serve. This stores really well for up to 2 weeks in the refrigerator.

Hummus

Servings

4

servings
Prep time

10

minutes
Cooking time

30

minutes

Ingredients

  • 1 cup of dried chickpeas, cooked or 1 tin of chickpeas

  • 2 tsp tahini

  • Salt

  • ½ tsp cumin

  • ½ tsp paprika

  • 1 clove of garlic

  • ½ lemon, juiced

  • 3-4 tbsp olive oil

Directions

  • Soak chickpeas and boil until soft, skip this step if using tinned chickpeas
  • Blend all the ingredients, except olive oil, together with a little water, use some of the boiling/tinned water
  • Add olive oil as it is blending to loosen

Prawn curry

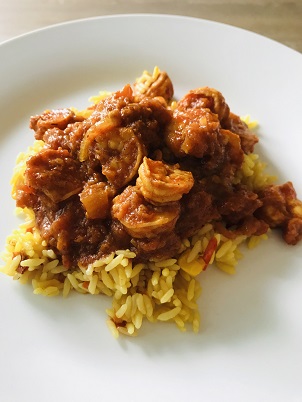
Prawn curry

A good, spicy prawn curry is one of the most delicious and prized Indian dishes. Due to the hefty price of prawns, it is often reserved for special occasions. I made this as a pre birthday celebratory dinner for my hubby.

The key is to use raw prawns so that it can be cooked with the spices so that flavours meld together beautifully. Also be very careful not to overcook the prawns they will most certainly turn rubbery, it is a very delicate meat and the taste will be destroyed.

This recipe is a must try for your next family celebration, it’s one that will surely impress.

Let’s get cooking…

First up prep your prawns, if you need to peel and devein them I often find the easiest way is to use a pair of kitchen scissors. Insert the blade in between the head and shell and cut straight down towards the tail. This will open up shell and just expose the vein so that it can be easily removed and the shell will peel away.

Marinate the prawns and allow it sit for a few minutes while you start to braise the tomato chutney. Once the chutney is cooking away melt the butter in a separate pan over a medium-hot flame. Thrown in the prawns and allow them to turn slightly pink then turn over and cook on the other side.

The tomato chutney should be at a stage now where you can add in the prawns and any pan juices. Stir and allow it cook together for 5 minutes. You want to prawns to be well coated in the tomatoey gravy. Finally garnish with chopped coriander leaves and serve with fluffy rice or paper thin rotis.

Prawn curry

Servings

4

servings
Prep time

20

minutes
Cooking time

40

minutes

Ingredients

  • 200g raw prawns/ shrimp, peeled and deveined

  • 1 tsp ginger and garlic paste

  • ½ tsp Kashmiri chilli powder

  • ½ salt

  • ½ tsp turmeric

  • ½ lemon, juiced

  • 1 tblsp butter

  • 1 portion of tomato chutney

  • 1 tsp coriander, chopped

Directions

  • Prep your prawns, then marinate with all the ingredients except the tomato chutney.
  • Melt the butter in a pan and saute prawns until golden and barely cooked, about 10 minutes. Do not overcook the prawns as they will become rubbery and very unpleasant to eat.
  • Prepare your tomato chutney and add in the prawns, simmer for 5 minutes.
  • Garnish with chopped coriander and serve with rice or roti

Jamie Oliver inspired Roast veg pizza

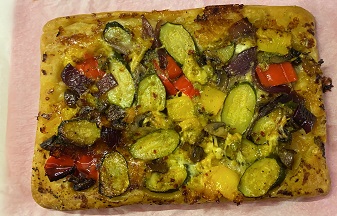
Jamie Oliver inspired roast veg pizza
roast veg pizza

It’s a Monday, not anyone’s favourite day of the week by any stretch of the imagination but it can be made so much better by having a speedy supper to look forward to. When Jamie Oliver released his then new cookbook Veg I remember the hype around his puff pastry pizza. I was determined to give this a try just because of how easy it looked.

Store bought shortcuts like readymade puff pastry and prepared roasting vegetables makes this even easier and quicker to rustle together.

Let’s get cooking…

Start off by chopping the veg into roughly 1cm sized pieces, you can use any veg that your family likes. My favourites for dishes like these are mushrooms, zucchini, bell peppers and red onions. Or if you are using ready prepared vegetables then skip straight to this step… Lay out the veg in a single layer on a baking sheet, use 2 trays if you need to because you don’t want to overcrowd the pan. Sprinkle liberally with olive oil, salt, pepper and some dried herbs and toss everything together to get all the veg coated in the seasoning. Throw on the garlic cloves but keep them in their skins to prevent burning.

Roast for 30 minutes then sprinkle over shredded or torn up fresh mozzarella. Place the puff pastry sheet over the vegetables and tuck the sides into the tray. Return tray to the oven and bake until golden.

Once it is done, remove from the oven and allow to cool for a few minutes then turn out onto to a board so that the vegetables are on top. Dollop over a little pesto and serve immediately!

Jamie Oliver inspired Roast veg pizza

Servings

4

servings
Prep time

10

minutes
Cooking time

40

minutes

Ingredients

  • 1 red onion, quartered

  • 2 courgette/ zucchini, thinly sliced

  • 2 bell peppers, I used red and yellow

  • 2 tblsp pesto

  • 1 tsp dried thyme

  • 1 sheet of store bought puff pastry

  • 1 cup of shredded mozzarella

  • Salt

  • Pepper

  • Olive oil

Directions

  • Toss vegetables with olive oil, salt, pepper and dried thyme, lay out in a single layer on a baking sheet and throw in the garlic with skins still on, roast for 30 minutes at 180
  • Sprinkle on mozzarella and tuck in puff pastry sheet over the vegetables and return to the oven for a further 30 minutes until pastry is golden
  • Once cooked, remove from oven, place a board over the tray and flip over. It should now look like a rectangular pizza
  • Dollop over pesto and serve